Close Menu
    Facebook X (Twitter) Instagram
    Saturday, May 17
    Facebook X (Twitter) Instagram YouTube
    10-4 Magazine
    • About
      • About 10-4
      • Contact
      • Our Advertisers
    • Subscribe
    • Calendar
    • Galleries
      • Centerfolds
      • Covers
    • Fun
      • Truckertoons
      • Words To Live By
    • TFK Truck Show
    • Trucker Rodeo
    10-4 Magazine
    You are at:Home»Do-It-Yourself – “How To…”»How to Install a Shock Box Cover
    Do-It-Yourself – “How To…”

    How to Install a Shock Box Cover

    By Bryan MartinMarch 1, 2023No Comments2 Mins Read
    Facebook Twitter Pinterest Email LinkedIn
    Share
    Facebook Twitter LinkedIn Pinterest Email

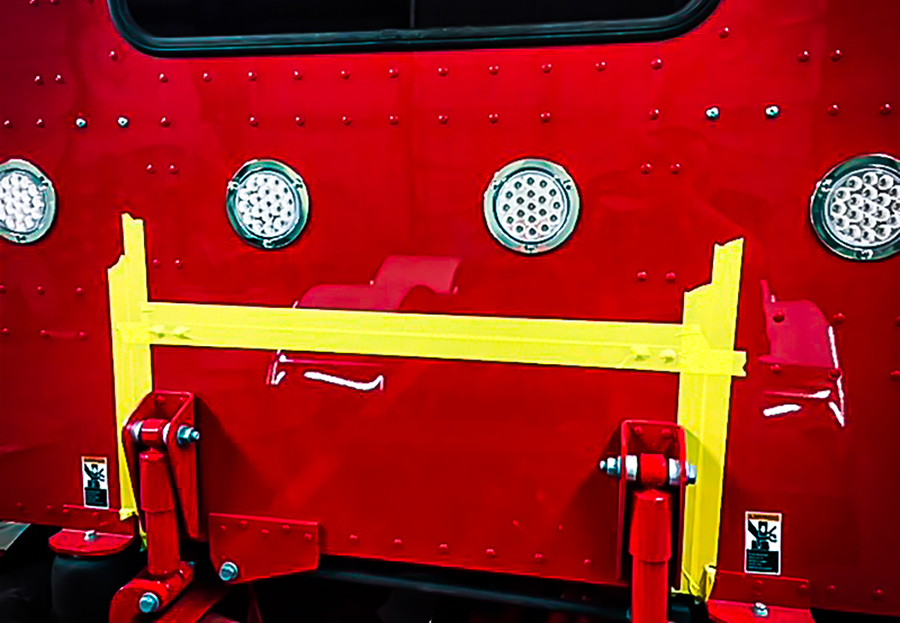
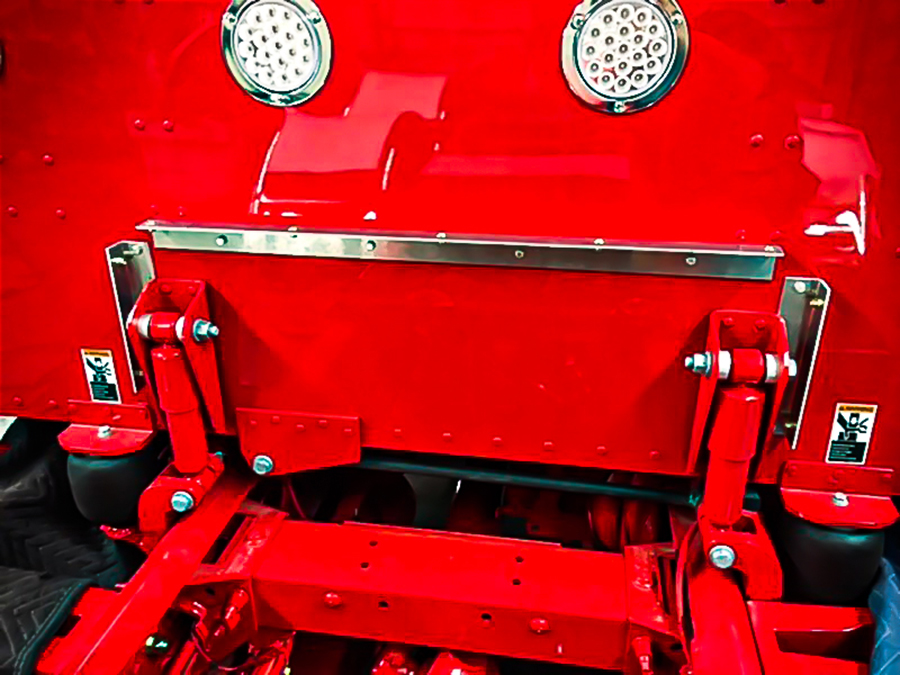
    Most of us would agree that the general appearance of the shocks and airbags on the back of any Peterbilt sleeper looks kinda cluttered up.  There are a host of different styles of shock box covers, and they are available in shiny stainless steel or paintable aluminum.  So, for any weekend mechanic or truck owner, these shock box covers make for an easy install!

    STEP 1

    Apply a couple strips of masking tape to the rear of the sleeper where the shock box will be installed.  This will be used as a surface to mark on, without having to mark onto your truck.

    STEP 2

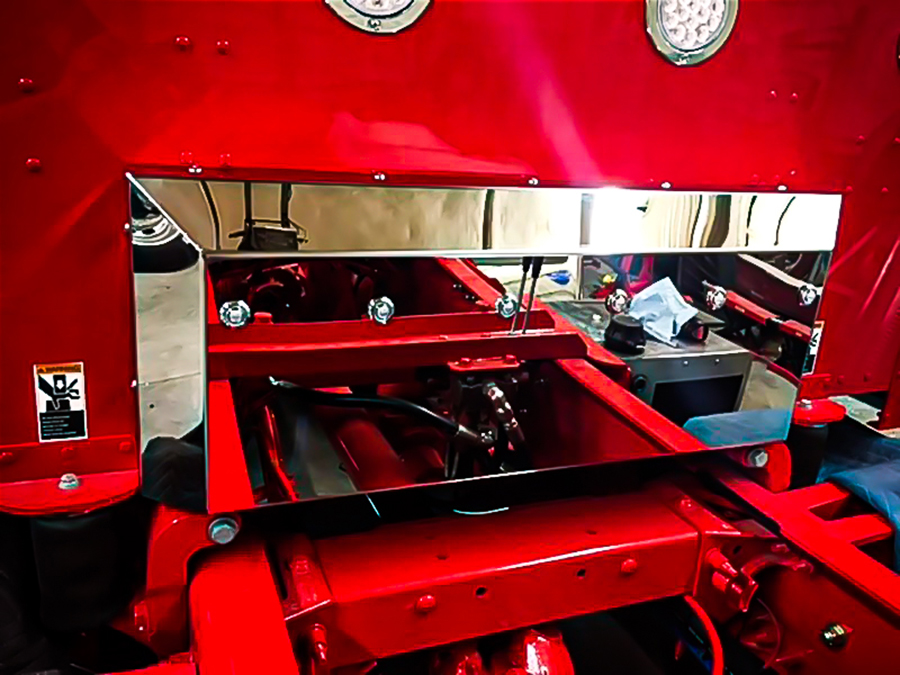
    Take the shock box cover and lean it up against back of sleeper where it’s going to mount and draw a line around it onto the masking tape.  Then, set the shock box cover aside.

    STEP 3

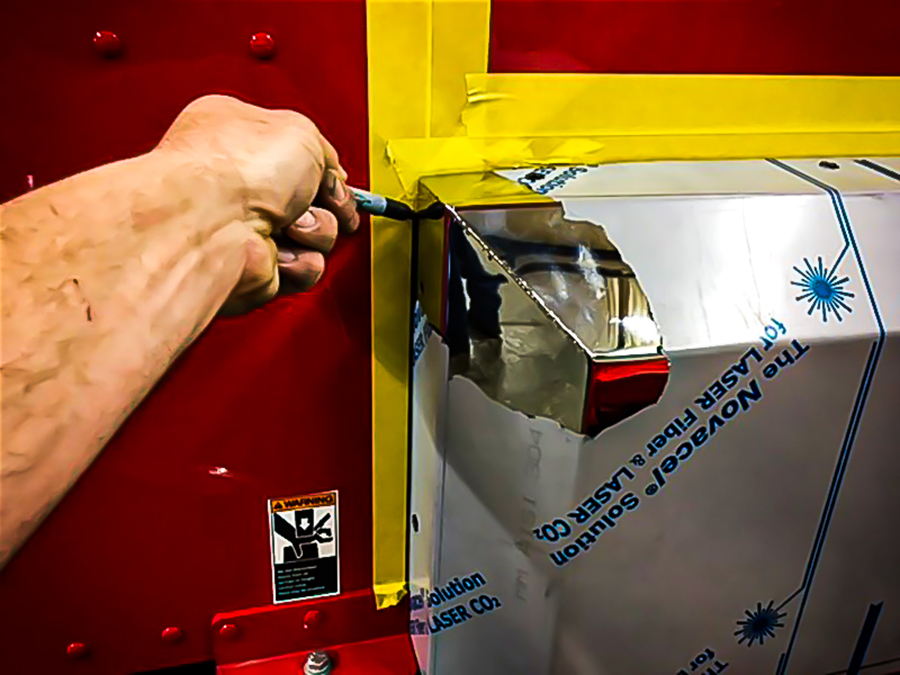
    Taking the top mounting bracket, set it just below the line and mark holes to drill into the back of the sleeper.  Repeat this process with the side brackets, as well.

    STEP 4

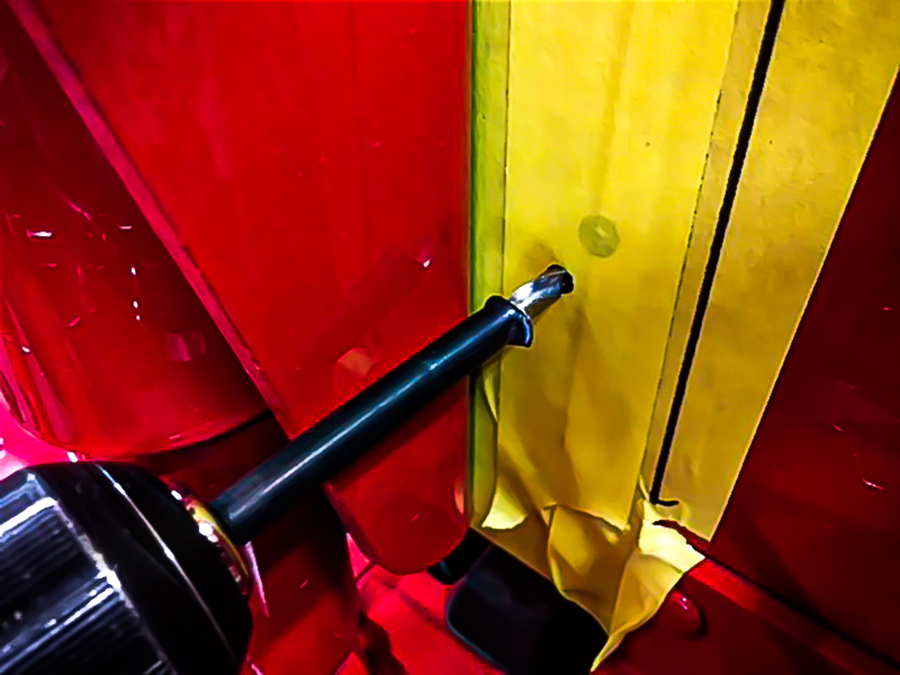
    Once the holes are marked, drill out each one with a 13/32 drill bit, and then install 1/4 nutserts into each hole.

    STEP 5

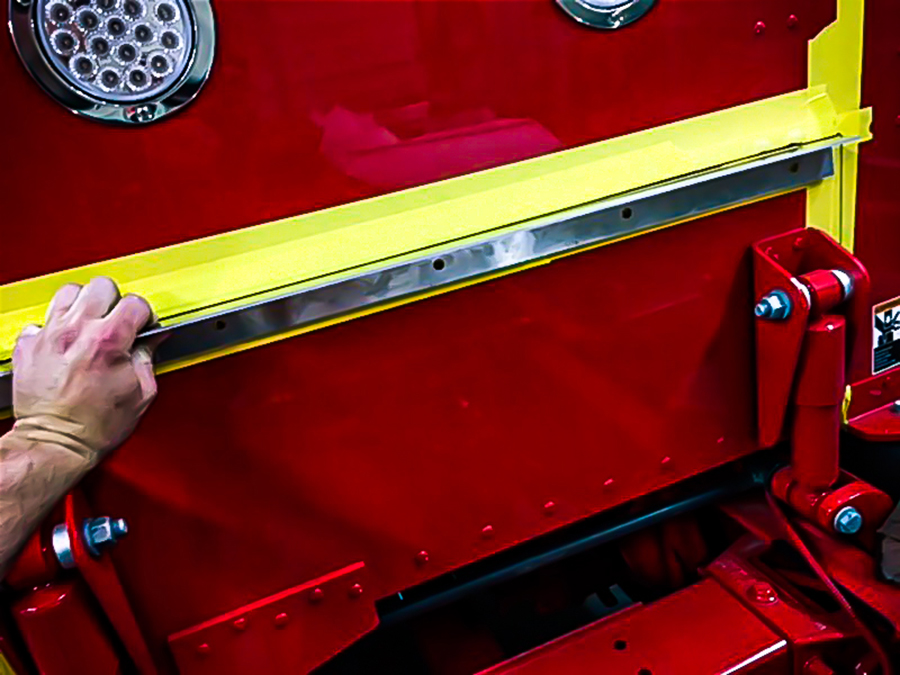
    Once all nutserts have been installed, remove the masking tape and install all 3 brackets with 1/4” bolts and tighten them down into place.

    STEP 6

    Finally, install the shock box cover into place, install the truss head bolts, and then wipe the box clean.  Installing lights into the shock box cover are optional and are available in a multitude of configurations.

    NOTE: The product being installed here is 01-101107.  Check out more shock box covers for your big rig at www.4statetrucks.com – Home of the Chrome Shop Mafia!

    Share. Facebook Twitter Pinterest LinkedIn Tumblr Email
    Previous ArticleDo The Job Nobody Wants
    Next Article Worth The Weight
    Bryan Martin

    Related Posts

    SCI Smart Pad Installation

    March 1, 2025

    Do-It-Yourself – Storage

    April 1, 2024

    How To Repair A Damaged Peterbilt Battery/Toolbox Step

    March 1, 2022
    Leave A Reply Cancel Reply

    12 ga Customs
    Pacific Coast Insurance picture
    Grand General

    Empire

    10-4 Magazine Swag from Stay Loaded
    Get your 10-4 Gear!
    Archived Editions by Category
    Older 10-4 Archives
    Articles Prior to 2011
    Archives by Edition
    Copyright © 2025. All Images and content on this site are protected by copyright laws, but 10-4 Magazine gives viewers the right to download images or text for personal use. Simply click on most images to access a higher resolution image for viewing and/or downloanding. For commercial uses, call for permission.

    Type above and press Enter to search. Press Esc to cancel.