
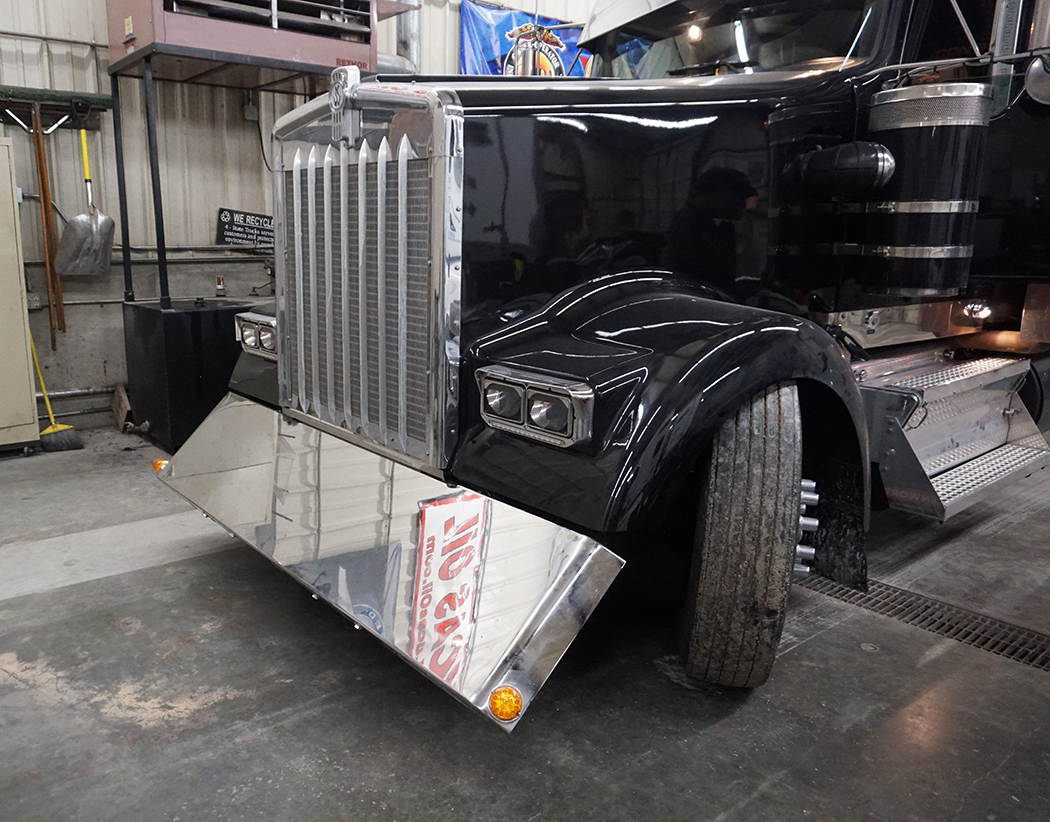
Afraid you may bend your bumper by getting too close to a curb, driving through a job site or hitting a pothole? If so, then a “Bumper Flip Kit” may be just what you need! With the flip of a switch on your dash, the bumper can flip up and increase your ground clearance by 4 to 6 inches. This added clearance is usually enough to allow you to miss the obstacle and save you from bending a $700 to $900 bumper! The job is not too difficult, and the kits come with detailed instructions. Most guys can install this in less than a full day. Here’s how to do it!
STEP 1:
Lay out your kit and ensure you have all the parts, pieces and hardware required. Start by removing your old bumper and bumper braces.
STEP 2:
Bolt the frame horn bracket on the front of the driver’s and passenger’s side frame horns.
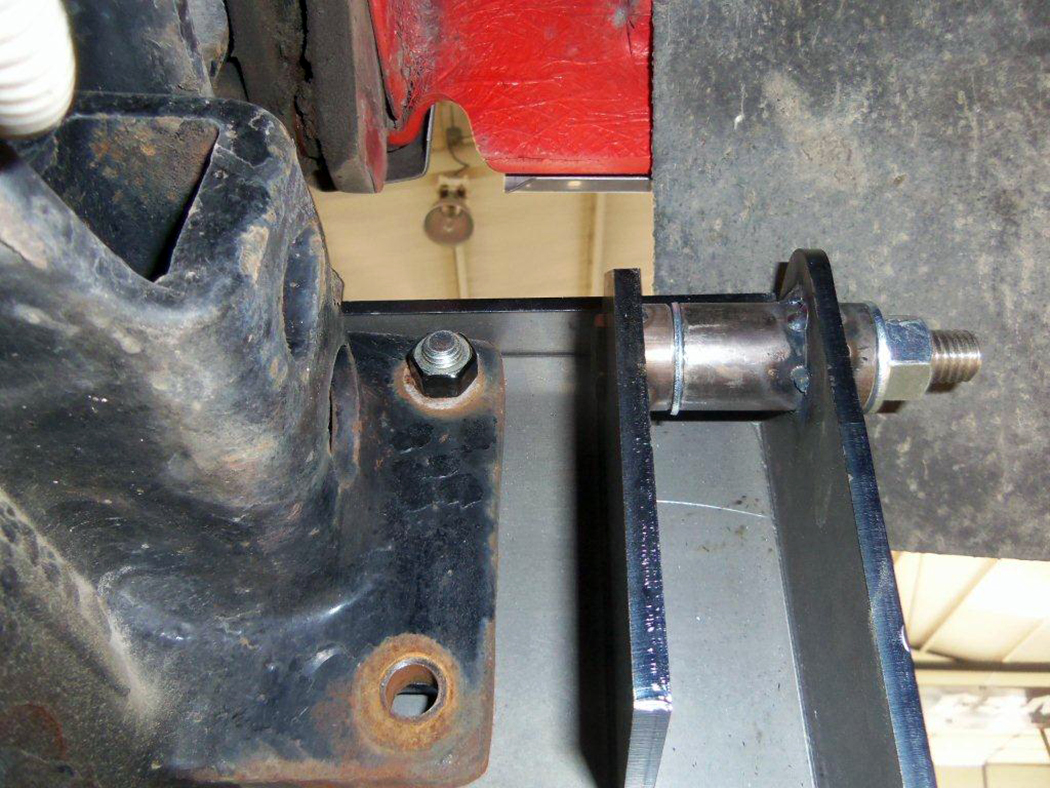
STEP 3:
Bolt the lift cylinder brackets to the frame as shown. Note: The jogged plate goes on the passenger’s side (Step 5) and the flat plate that is notched with a large “V” mounts to the steering gearbox on the driver’s side.
STEP 4:
Bolt the swing plates onto the frame horn bracket as shown using top lock nuts. Apply a liberal amount of anti-seize or other heavy lubricant to the pivot bolts and insert them into the holes on the end of the frame bracket. Make sure to use washers between the bushings and do not over-tighten as this will result in drag when the bumper is flipping.

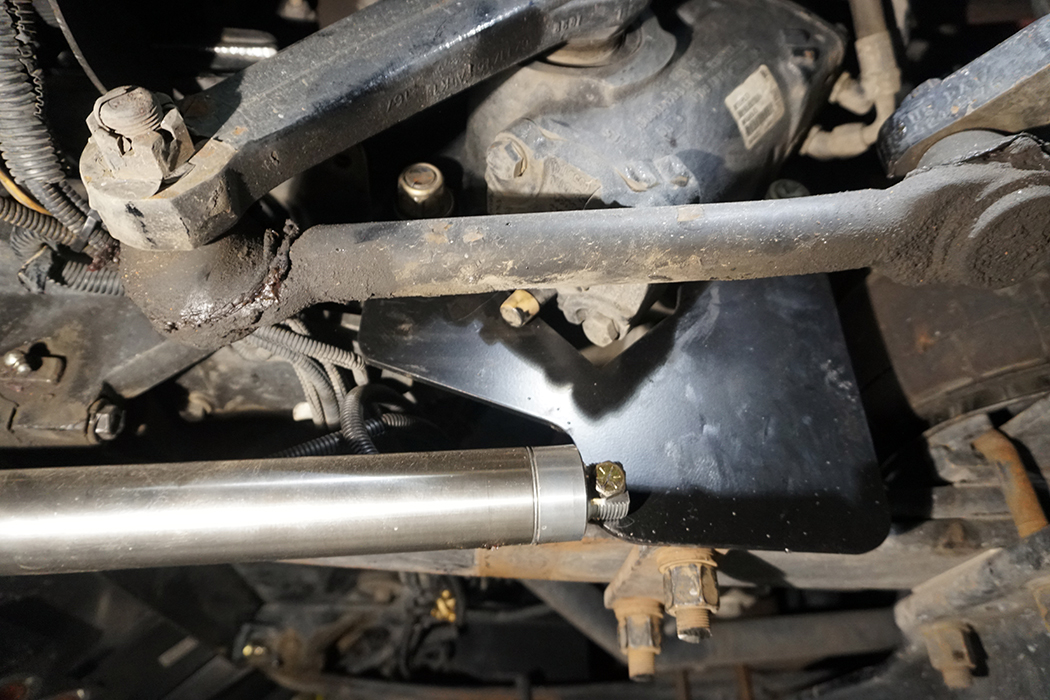
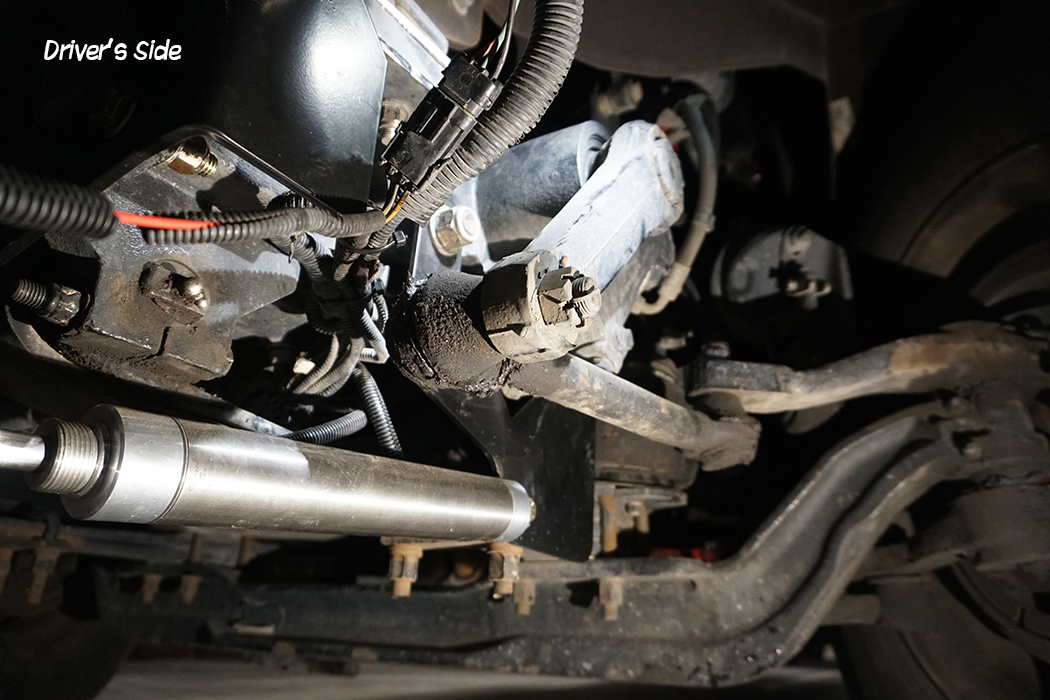
STEP 5:
Attach the cylinders to the frame mounted cylinder bracket and attach the clevis end of the cylinder to the back of the swing plate. Install driver’s side cylinder with air fitting facing the inside of the truck frame for pitman arm clearance when turning.
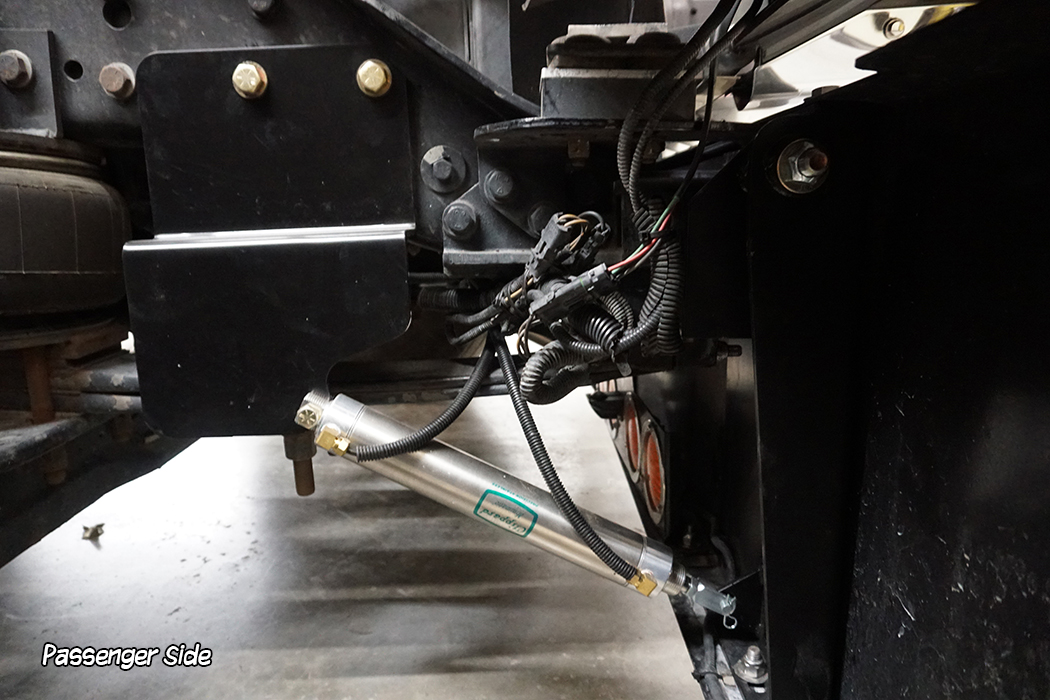
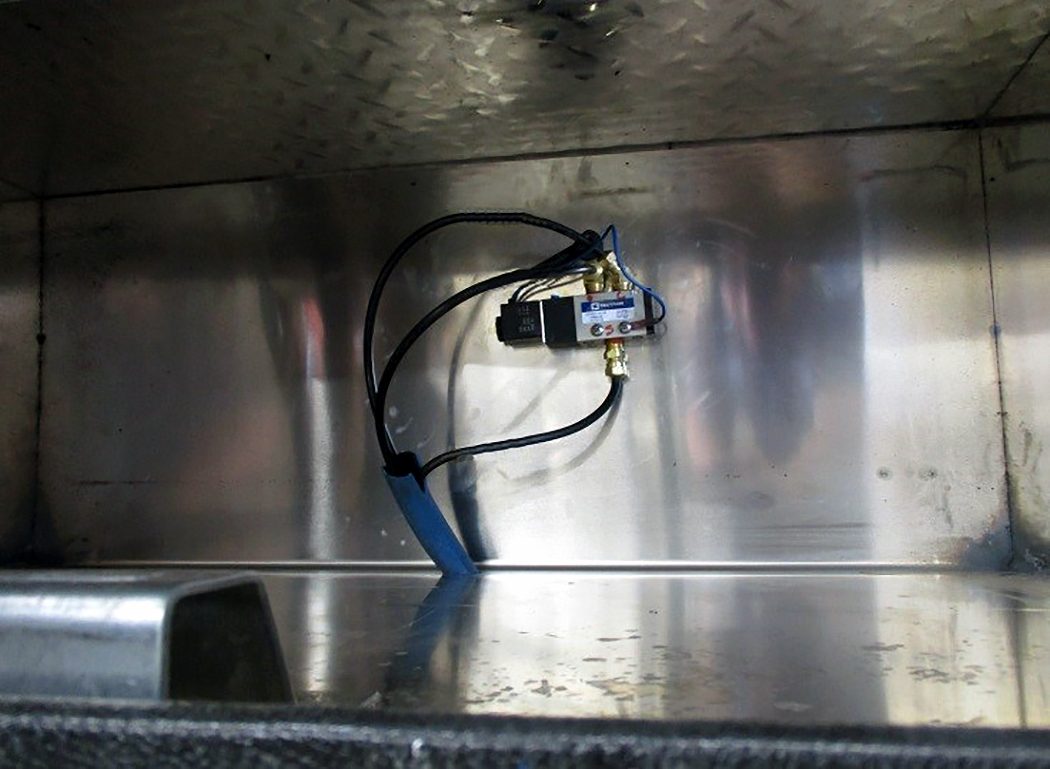
STEP 6:
Decide on a location for the solenoid/valve to be mounted. We prefer to mount it in the passenger side toolbox if possible. This keeps it out of the weather and more protected. Do not mount the solenoid valve under the hood. The hood cannot be opened with bumper lifted and vice versa.
STEP 7:
Place a piece of tape on the air line coming from the base of each cylinder. This ensures one cylinder’s air line isn’t “pushing” while the other is “pulling” after you get the lines run.
STEP 8:
Connect air lines from the end of each cylinder to the supplied “T” fittings cross. Run two air lines from the middle of the “T” to where you’re mounting the valve and regulator. Secure “T” and air lines to frame or other support. Note: “A” port is front and “B” (air line with tape) is rear, but do not hook these up yet.
STEP 9:
Run two air lines to the solenoid/valve. You will need to tap into an unused port in your air tank or, if one is unavailable, “T” into an existing line. This line will need to run to the supply side of your solenoid/valve.
STEP 10:
One of the wires from your valve will be a ground and one will need to be wired to a spare on/off switch in the dash. The two blue wires are not specific to power or ground, so either wire could be powered or grounded. Be sure to have a circuit protected by a circuit breaker or fuse (a 10- to 15-amp rating will suffice).
Reinstall your bumper just as you would any UST/boltless bumper. Manually lift the bumper to check clearance before putting power to the lift kit. After confirming clearance, connect the air lines at the valve, flip the switch and make sure all wiring, connections and plumbing are correct. Note: If using a 22” bumper, you will need to use the 2” wide spacer channel provided at the bottom of the bumper.
Check out more “Bumper Flip Kit” options for your big rig at www.4statetrucks.com – Home of the Chrome Shop Mafia!
1 Comment
Why is there no installation instructions for my flip kit for my Peterbilt 379