
“Nothing looks as classic as a stainless steel, one-piece, full width rear light bar! This is the CSM Bilt version featuring heavy gauge 304 stainless and a full backing panel to keep all the snow, ice and contaminants from harming the electrical connections. The wiring can be a lil’ intimidating, but the mounting is easier than you may think. Check out the Step-By-Step below and you can have the install done in a few short hours!” Bryan “Bossman” Martin
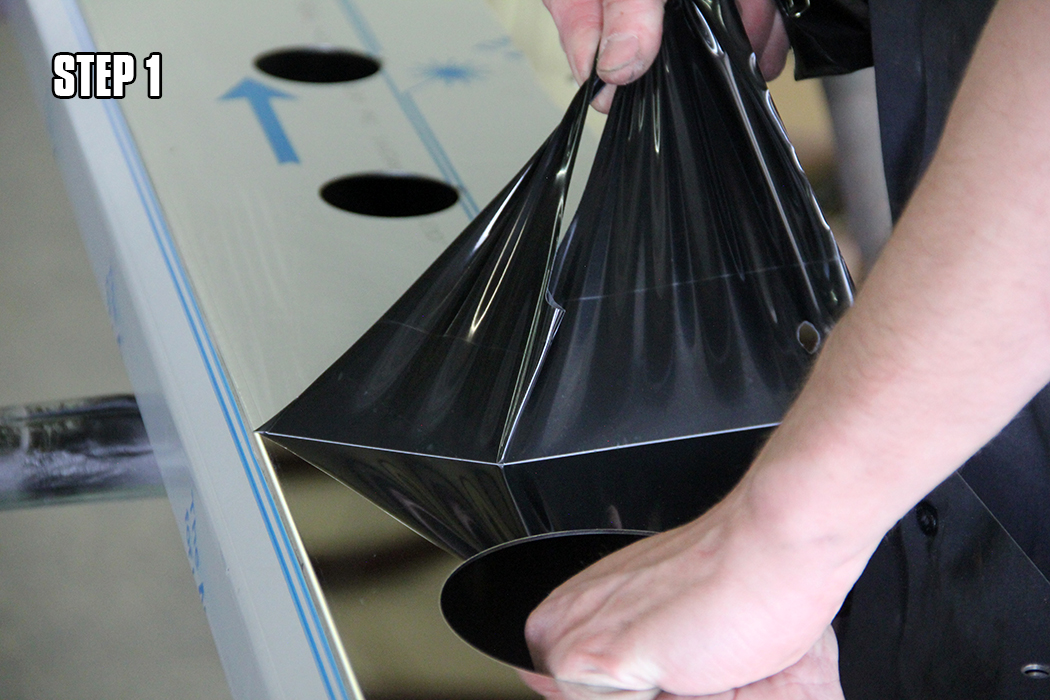
STEP 1: With light bar set up on a suitable stand, remove protective vinyl covering from the areas around the light cutouts and mounting locations. Leaving the rest on until mounted can prevent scratches from handling and installation.
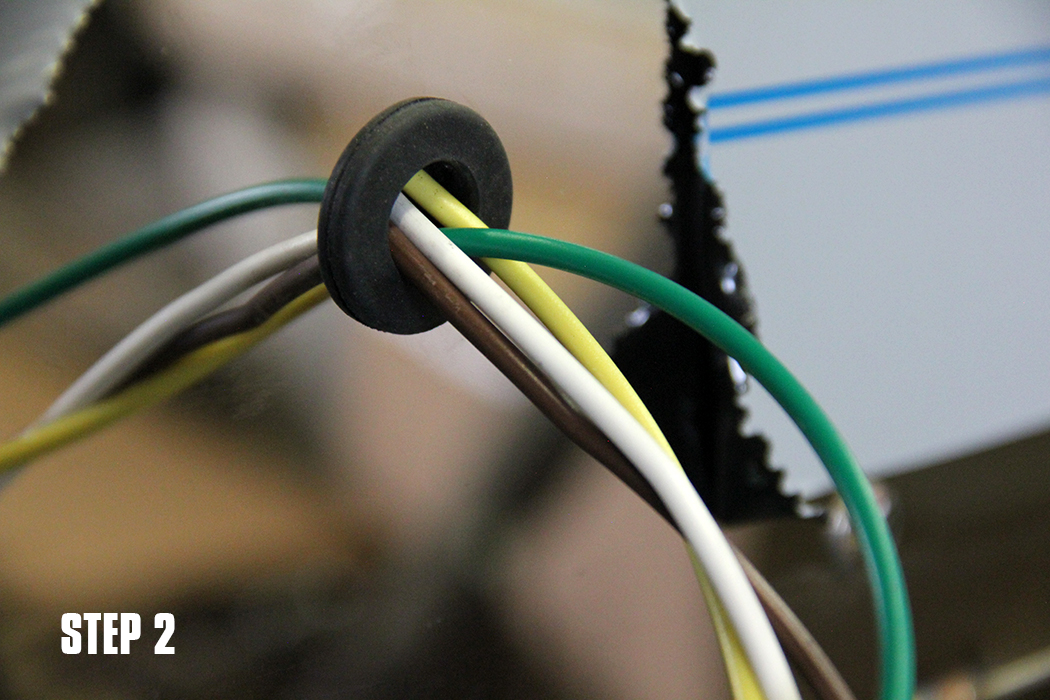
STEP 2: Using standard wire colors (brown – tail marker, green – right turn/brake, yellow – left turn/brake, white – ground), feed wires through grommet in the back side of the light bar to the areas where the light connections will be. Leave an excess amount of wire coming through the light bar to make it easier to work with connection to the truck.
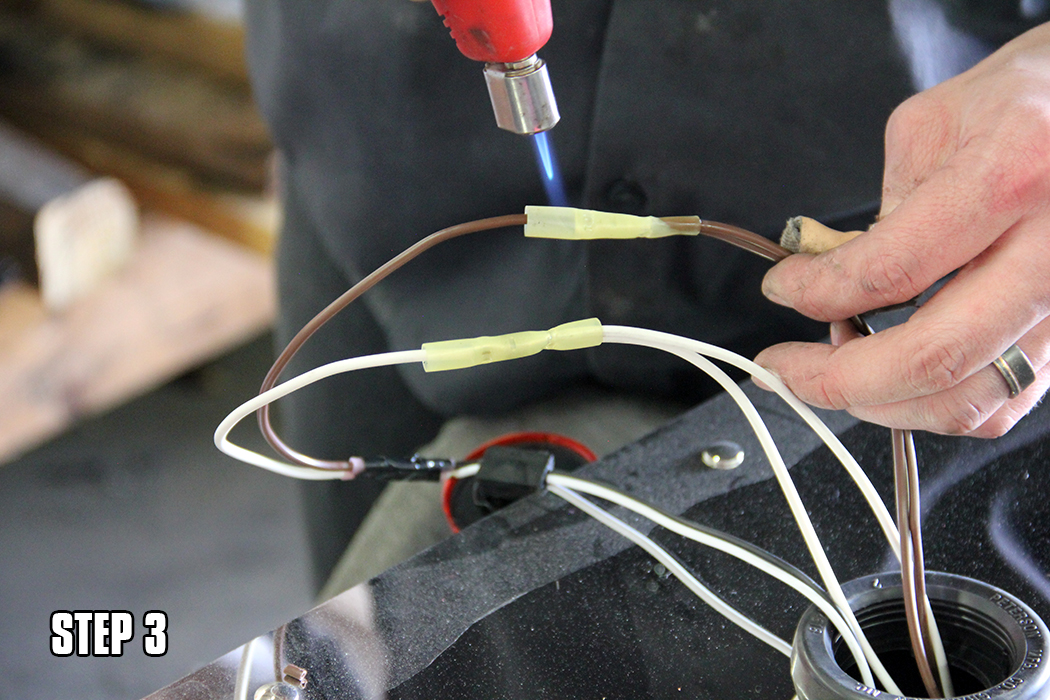
STEP 3: Using proper heat shrink connectors, attach light connector pigtails to their respective wires.
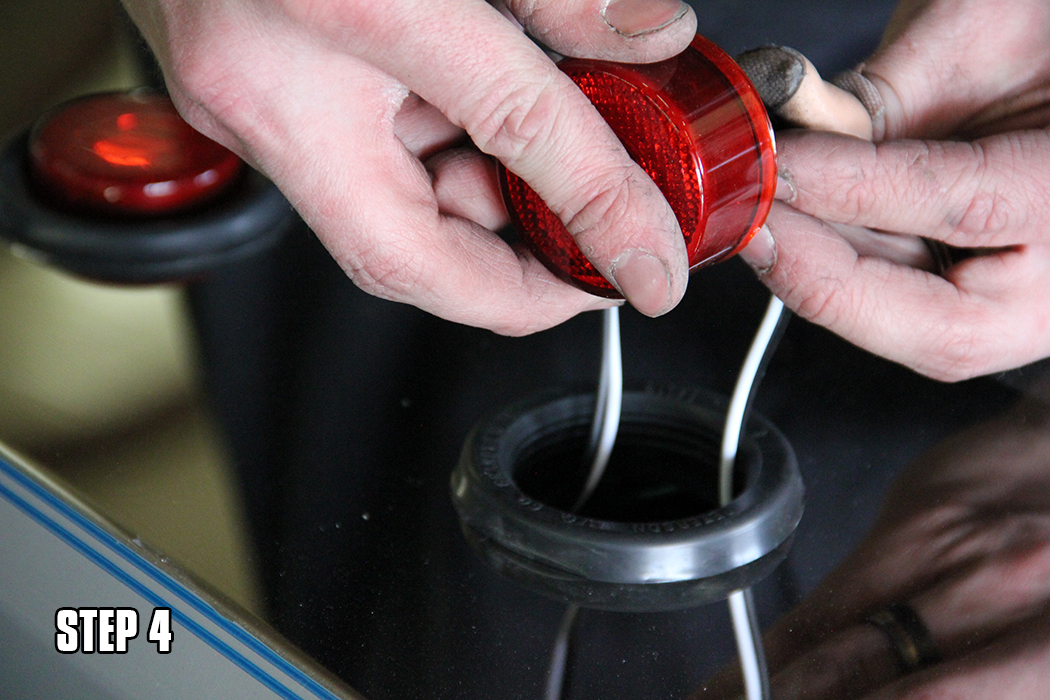
STEP 4: Install grommets or bezels into light cutouts. Connect lights to their wire connectors and insert lights into the grommets or bezels.
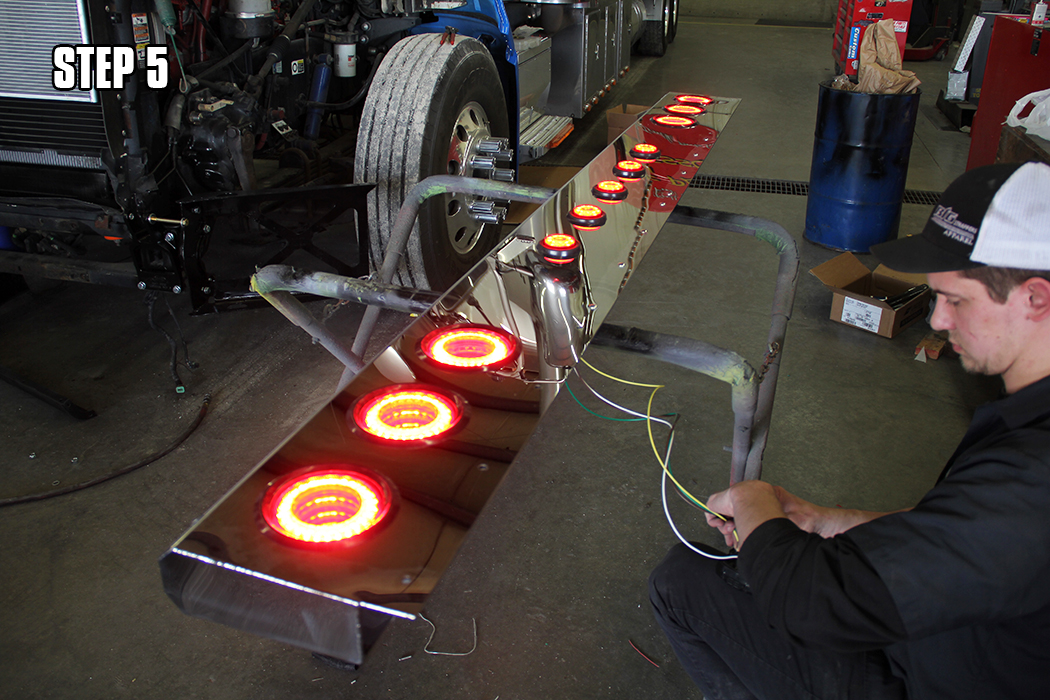
STEP 5: With a battery or suitable power source, test for proper functions of the lights.
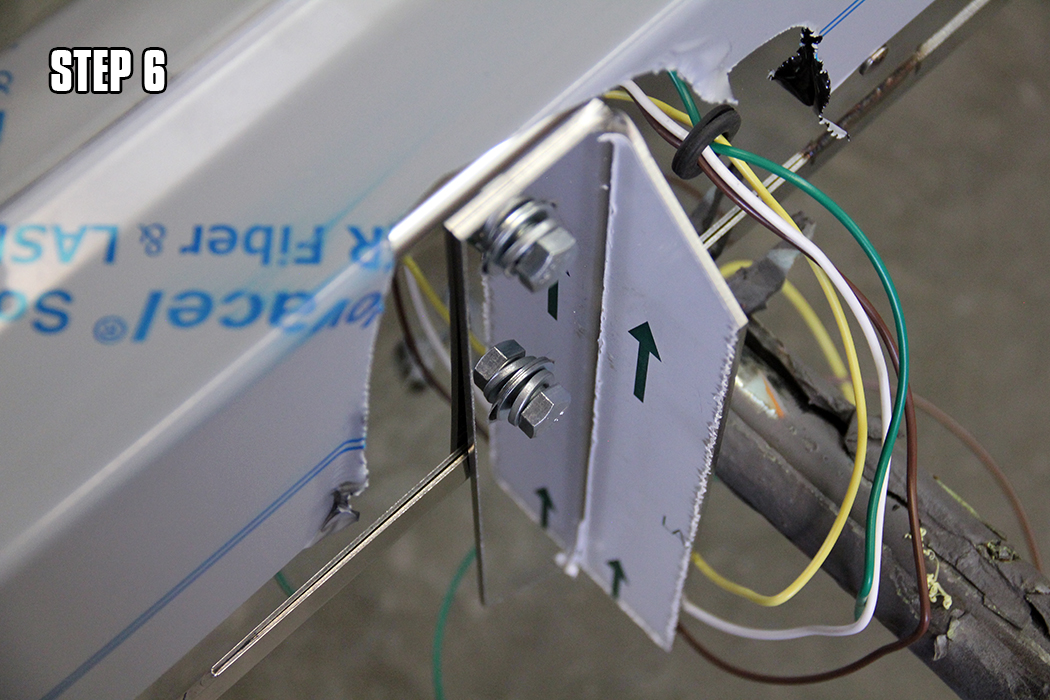
STEP 6: Loosely attach mounting brackets to the back side of the light bar. The bent angles face towards the center of the light bar.
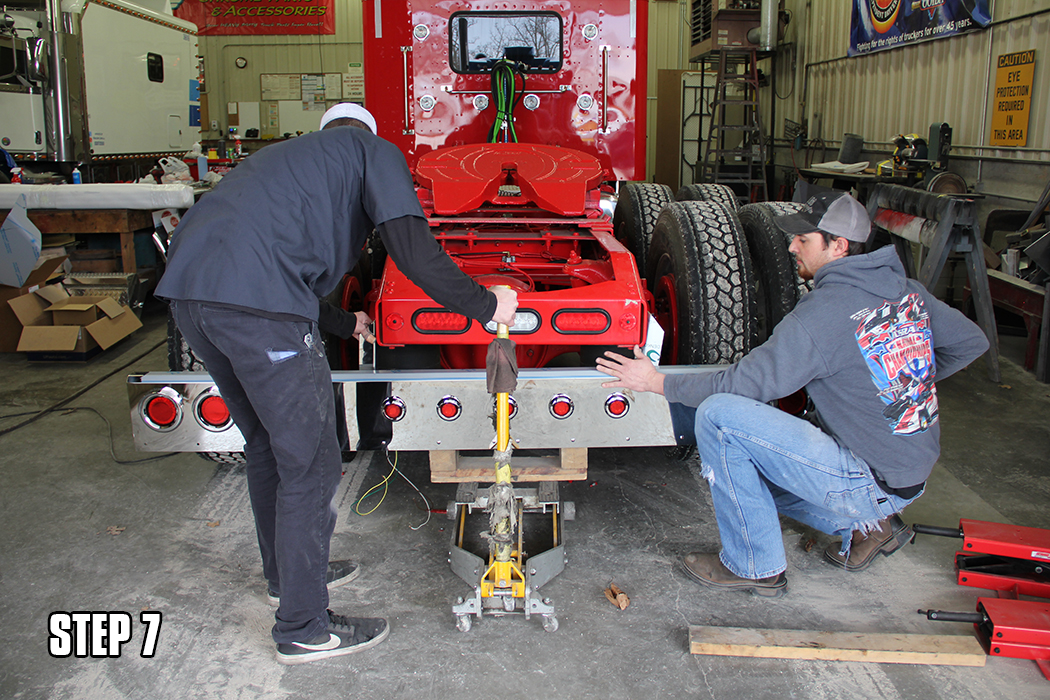
STEP 7: With assistance, set the light bar up to the rear of the truck. Fit the face of the light bar flush with the rear of the frame, up to the bottom of the frame.
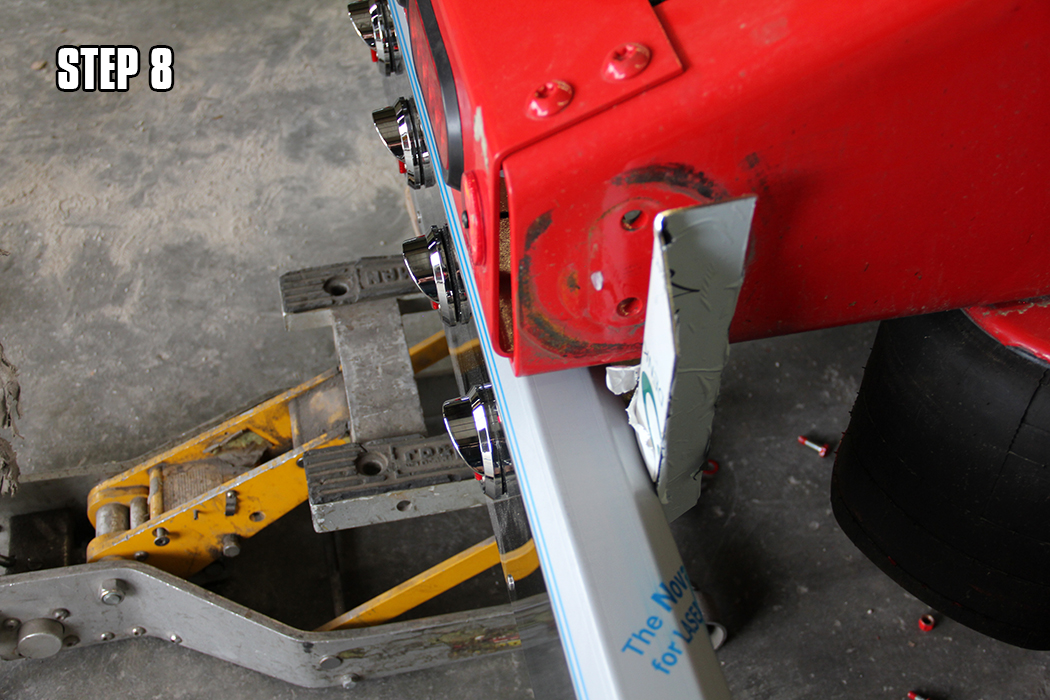
STEP 8: Using a floor jack and clamps, secure the brackets to the frame. If there are existing holes to use, they can be traced onto the brackets to be drilled. If not, drill two ½” holes in each bracket to the frame and secure with proper ½” bolts. At this time, tighten bolts in bracket to light bar.
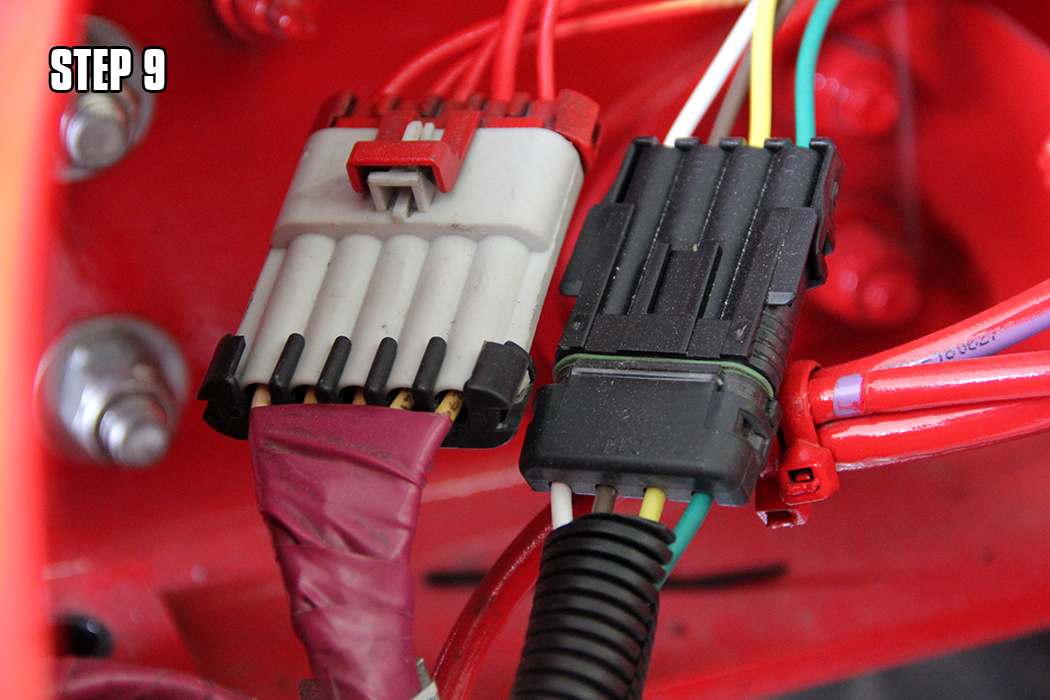
STEP 9: Use an appropriate weather-pack connector to make connection to the truck’s taillight harness and test for proper function.
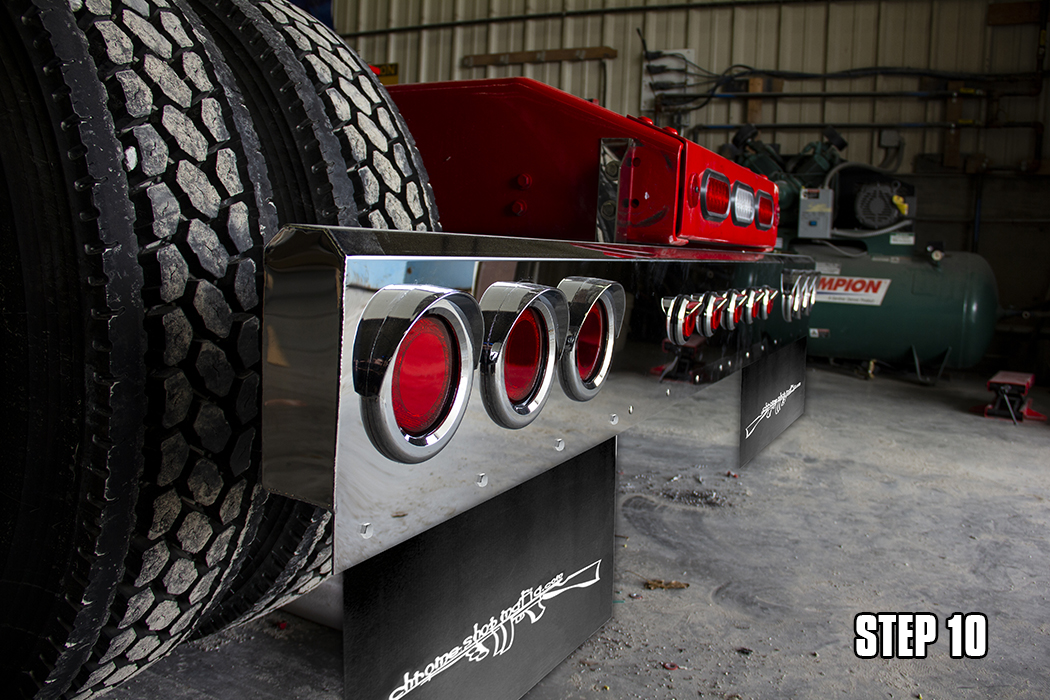
STEP 10: Finish off by adding any desired trim bezels to lights and/or mud flaps to the lower flange of the light bar. Then, step back and enjoy your new look!
Check out more Rear Light Bars for your big rig at www.4statetrucks.com – home of the Chrome Shop Mafia!