
1. INSTALL ELECTRICAL HARNESS
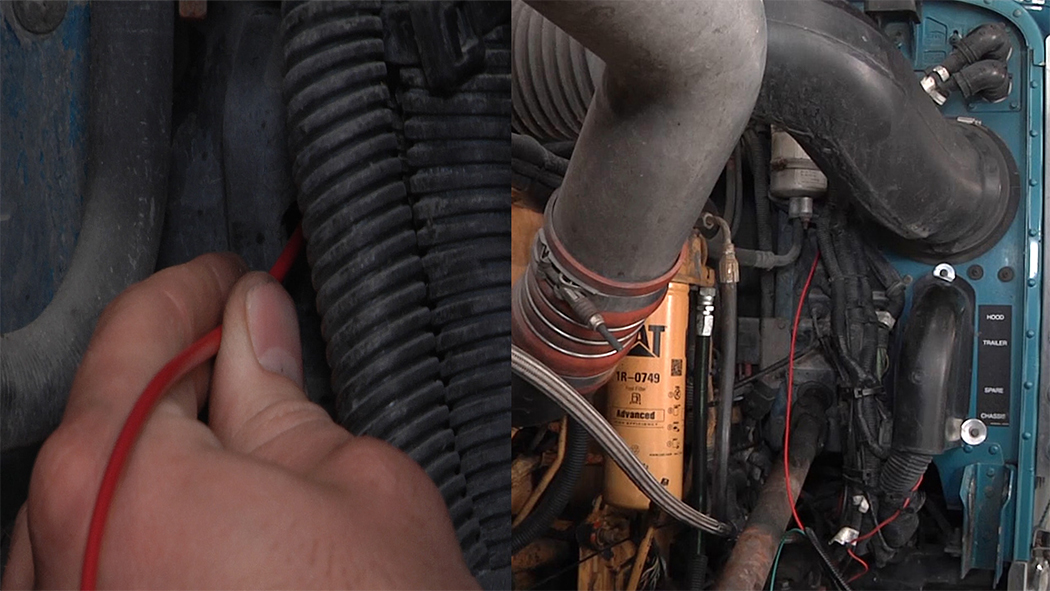 The installation of the electrical harness should be completed first. This will allow power to be applied to the pump during installation.
First, select the best location in the firewall for running the wiring harness from the engine compartment to the cab. Use an existing hole in the firewall or drill a 7/8” hole in the firewall and install RS-2684 grommet for ease of installation and protection of wire harness.
Then, route the red wire of the wire extension through the grommet in the firewall to the ignition or fuse panel. Locate a terminal that is hot when the key is in the ignition position. Use a test probe to identify the proper terminal.
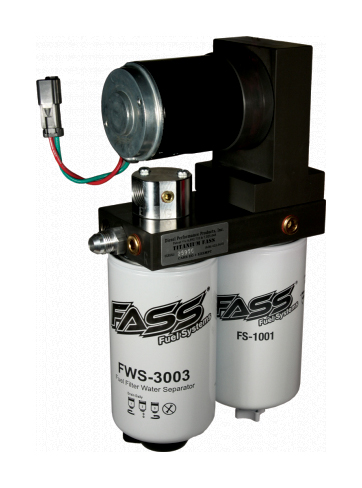
2. PREP THE FASS SYSTEM
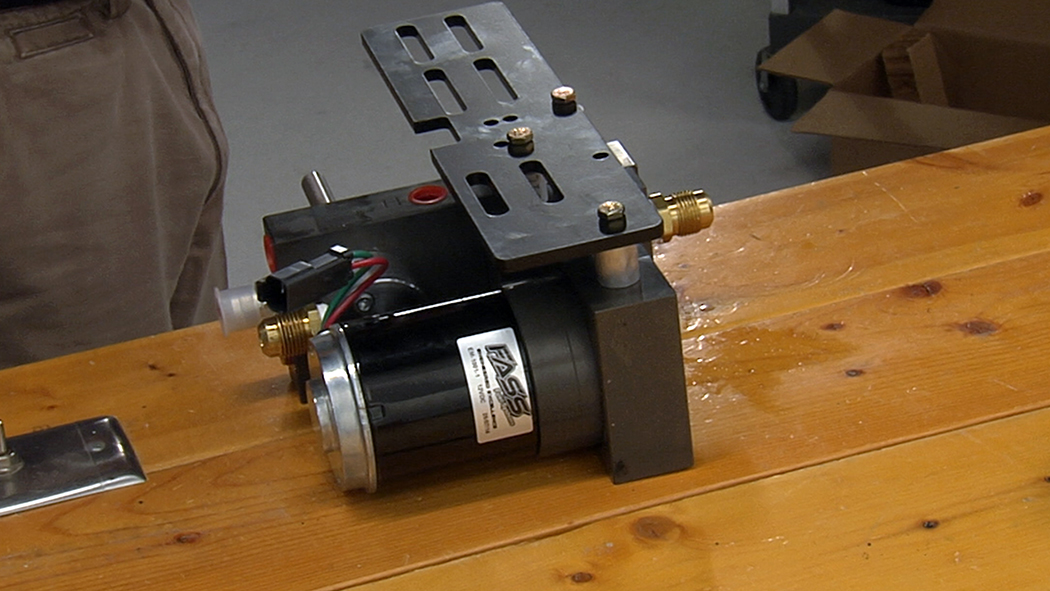 Next, we will need to prep the FASS System. During this process, be careful not to bend or damage the draw tube. Remove the RED “E” plug and the RED “T” plug. Prepare 2 brass fittings by wrapping 4 rounds of thread tape on pipe fitting end only. Install 2 brass fittings into the “E” port and “T” port. Properly torque fittings.
Then, install the BR-2001 bracket to the FASS System. Place the 3 spacers on the FASS and install bracket using 1/4” bolts. Properly torque bracket.
3. INSTALL FUEL FILTERS
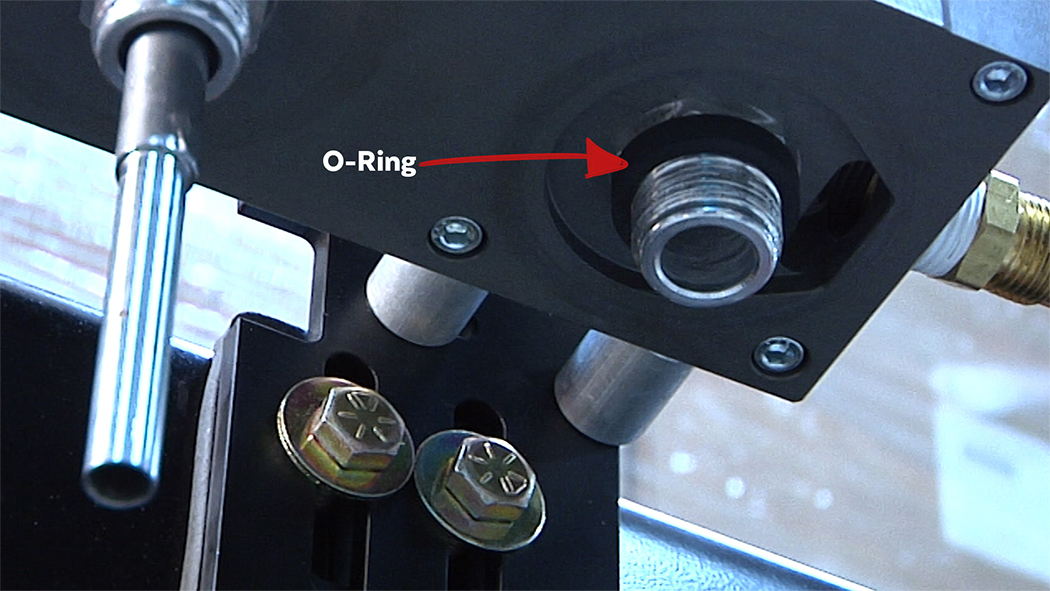 Prior to installing the fuel filters, make sure to locate the loose O-ring that comes with the water separator and slide it around the fuel filter nipple.
Next, apply grease or motor oil to O-rings located on the filters.
Then, attach to system and tighten appropriately. Do not over tighten the fuel filters.
4. ASSEMBLE THE FUEL LINES
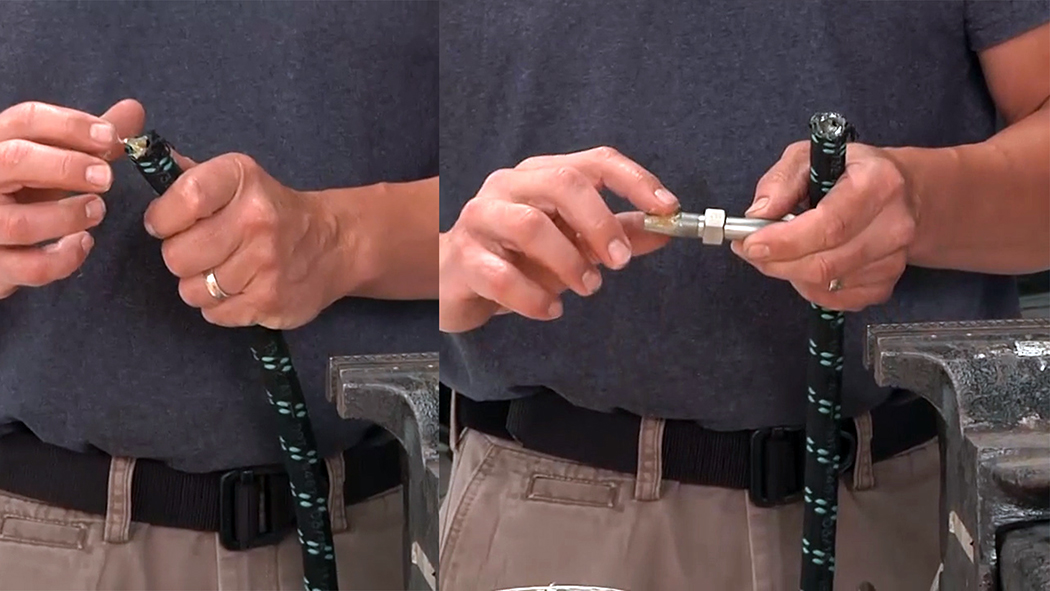 Grease the female portion of the fuel line, making sure to grease the inside of the fuel line and on the male portion of the 90 fitting. By hand, install the collar to the fuel line. Notice the collar is reverse thread. Do not over tighten the collar. This will ensure proper fitting installation.
Now, install the 90 fitting. Properly torque.
5. MEASURE THE PROPER LENGTH OF THE RETURN LINE
 Run the fuel line through the engine compartment and loosely connect to the return line fitting on the FASS unit.
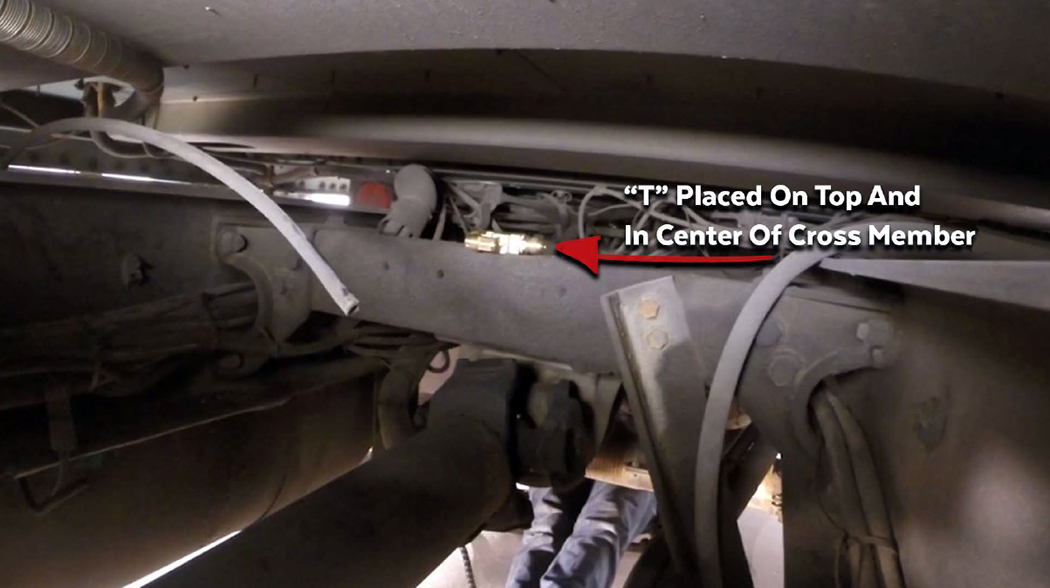
Run the remaining line down the chassis and to the “T” on the top middle of the cross-member.
Hold it in center of “T” and then mark that spot. Remove hose from truck. Cut the line in this spot using a chop saw.
6. CUT THE FUEL LINE
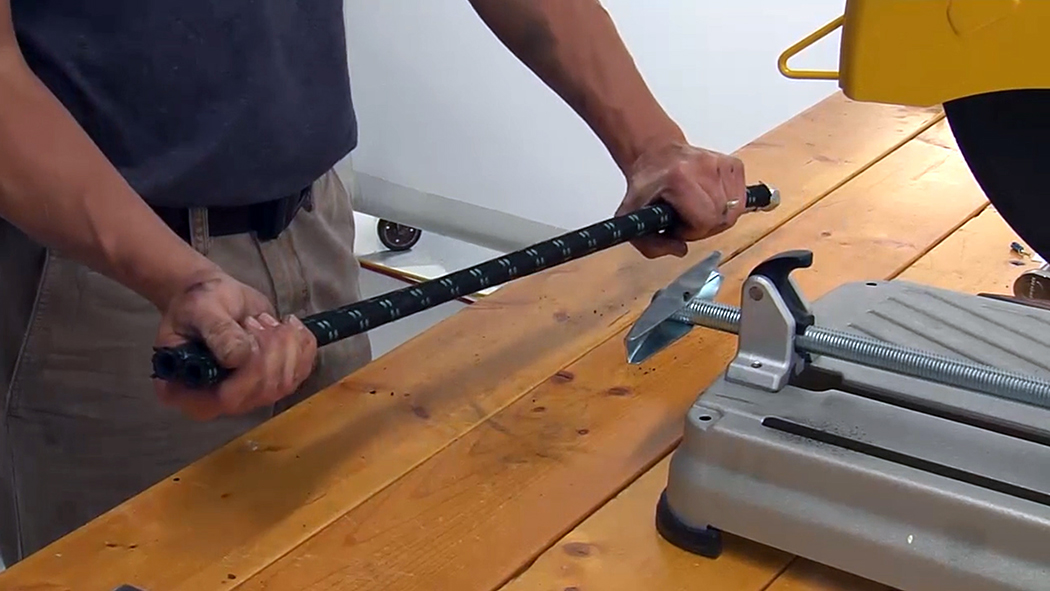 It is CRITICAL that these lines be the same length – NO EXCEPTIONS!
The distance from both the fuel tanks to the “T” and the double vent “T” may not be the same, so make the longest hose first. After cutting line, install it to insure adequate length, then remove and make ALL HOSES that same length.
7. INSTALL ALL THE FUEL LINES
 Connect the fuel lines to the double vent returns on top of the tanks and properly torque.
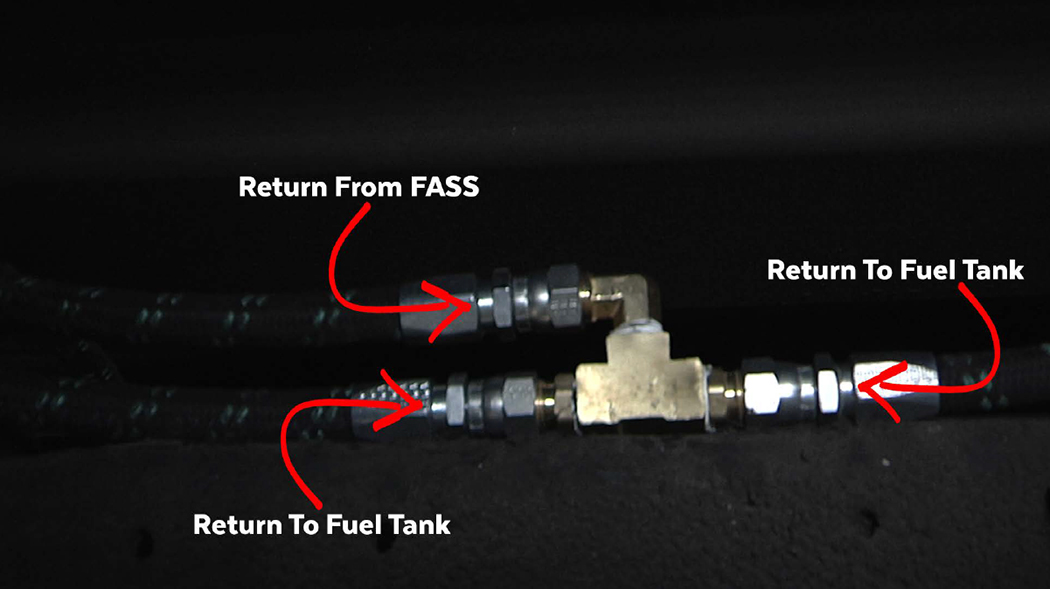
Connect the fuel lines to the “T” on top of the cross-member. Install the straight fitting of the return line to the “T” on top of the cross-member. Properly torque.
Run the return line up through the engine compartment from underneath the truck and install 90 fitting to the return port on the FASS system. Properly torque.
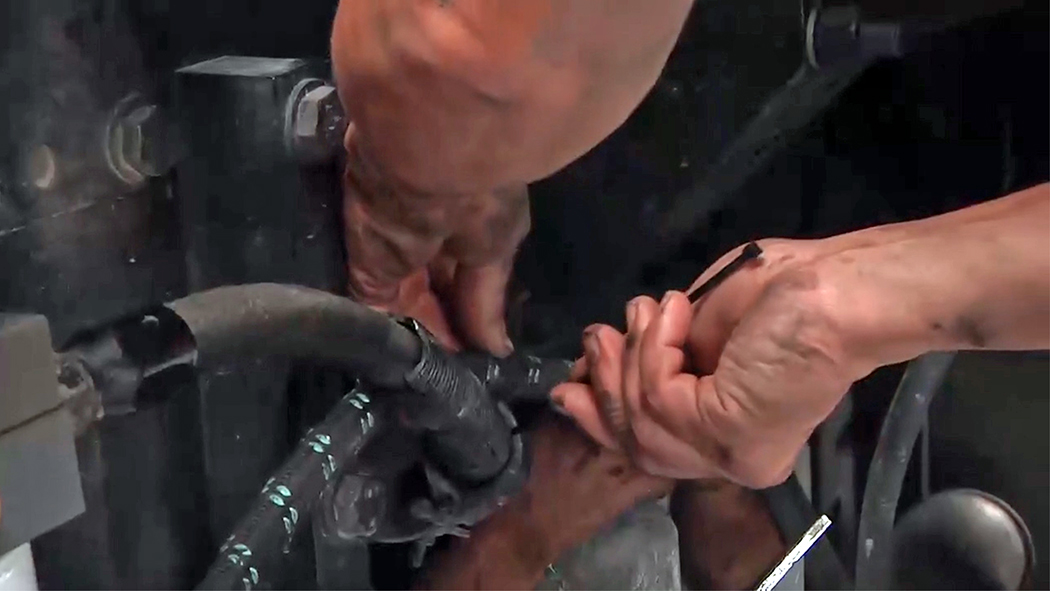
Install the original suction line from the fuel tank to the “T” port on the FASS. Properly torque.
Install the original fuel pump line from the truck to the “E” port on the FASS. Properly torque.
8. CHECK FOR LEAKS
While the FASS system is running, complete an inspection of the truck and check for any leaks.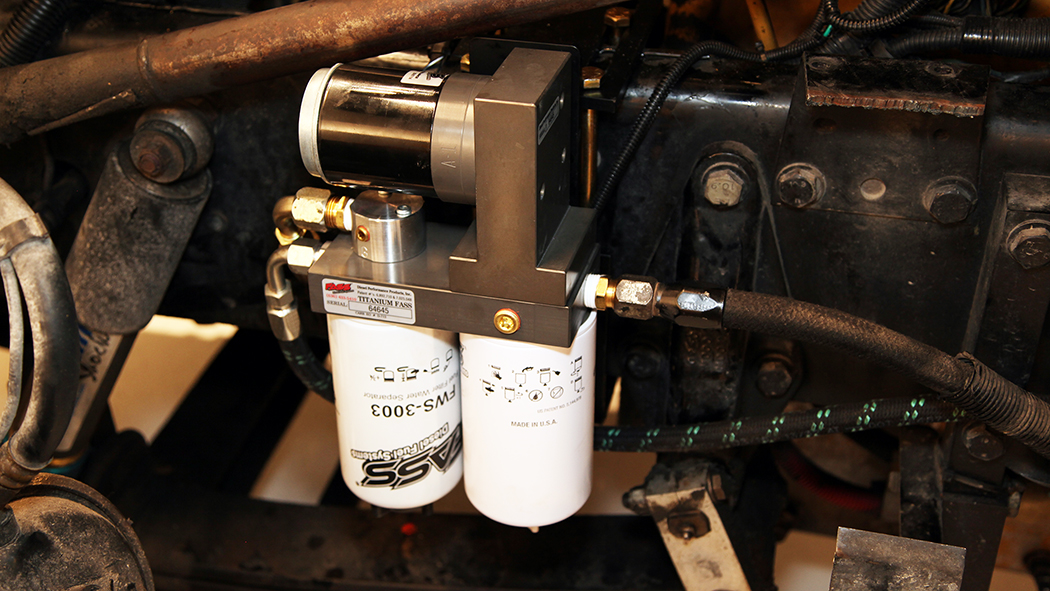
9. SECURE ALL FUEL & ELECTRICAL LINES
 Once you are confident the installation is complete and there are no signs of leaks, secure all electrical lines and fuel lines.
Make sure the “T” on top of the cross-member is perfectly positioned horizontally and secured.
Check out more FASS Fuel Systems for your Big Rig at www.4statetrucks.com – Home of the Chrome Shop Mafia.