Close Menu
    Facebook X (Twitter) Instagram
    Wednesday, May 21
    Facebook X (Twitter) Instagram YouTube
    10-4 Magazine
    • About
      • About 10-4
      • Contact
      • Our Advertisers
    • Subscribe
    • Calendar
    • Galleries
      • Centerfolds
      • Covers
    • Fun
      • Truckertoons
      • Words To Live By
    • TFK Truck Show
    • Trucker Rodeo
    10-4 Magazine
    You are at:Home»Do-It-Yourself – “How To…”»How To… Chop Your Air Cleaner Screens
    Do-It-Yourself – “How To…”

    How To… Chop Your Air Cleaner Screens

    By Bryan MartinJanuary 1, 2016Updated:January 7, 20162 Comments2 Mins Read
    Facebook Twitter Pinterest Email LinkedIn
    Share
    Facebook Twitter LinkedIn Pinterest Email

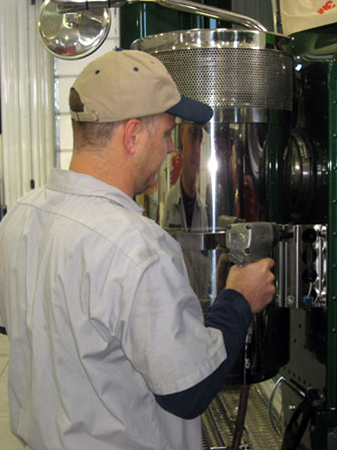
    STEP 1: Remove the bolts that hold the bands to the cab bracket and loosen the clamp around the rubber outlet boot. Carefully remove the filter assembly from the cab.

    HowToStep01

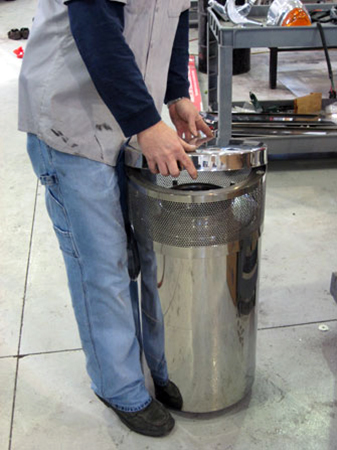
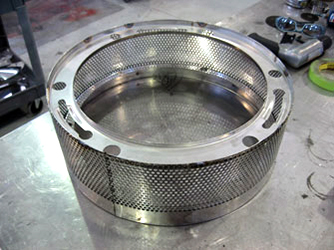
    STEP 2: Twist the cap off the filter assembly. Remove the 4 inner nuts to remove the screen assembly and then place the screen on a sturdy work surface/bench.

    HowToStep02

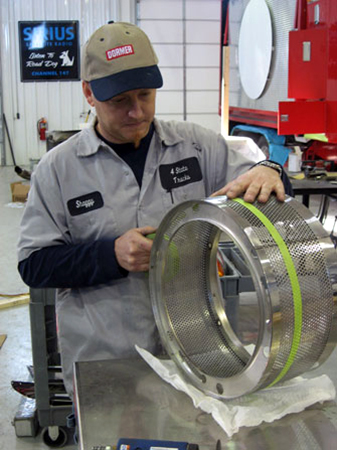
    STEP 3: Measure desired height down from the top of the screen and then mark it (we are removing 2 inches). Use tape to identify a straight line for cutting the screen.

    HowToStep03

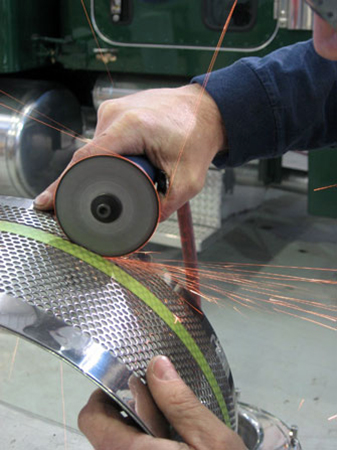
    STEP 4: Use a grinder with a cutoff wheel to make the necessary cut (wear eye protection). Also, use grinder to split the screen from the cap’s fastening ring.

    HowToStep04

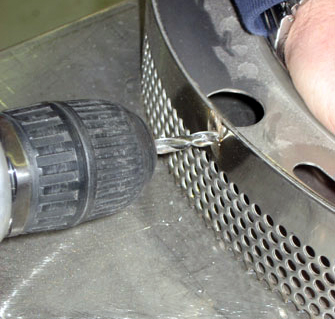
    STEP 5: Drill out the spot welds that fasten the screen to the ring.

    HowToStep05

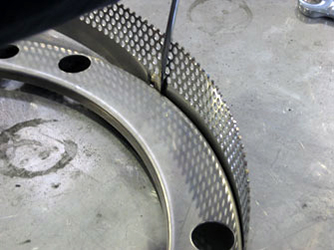
    STEP 6: Separate the ring from the screen using a flat-head screwdriver.

    HowToStep06

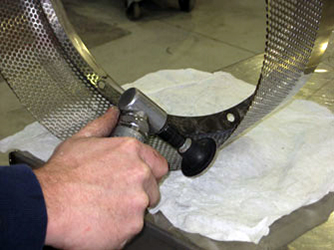
    STEP 7: De-burr the edges of the screen and remove any uneven edges.

    HowToStep07

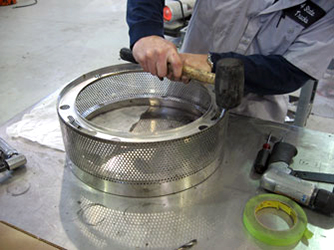
    STEP 8: Use a rubber mallet to drive the ring into the shortened screen.

    HowToStep08

    STEP 9: Spot weld the screen back onto the fastening ring (or have your local welding shop do it).

    HowToStep09

    STEP 10: Secure screen to filter body with 4 nuts and then put the cap back on the filter assembly.

    HowToStep10

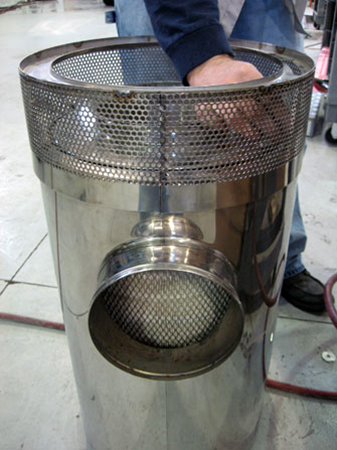
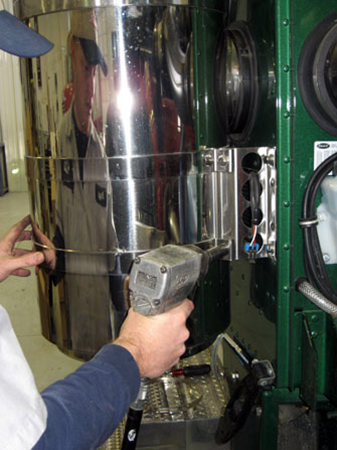
    STEP 11: Carefully install them back to the side of the cab the same way they were originally installed.

    HowToStep11

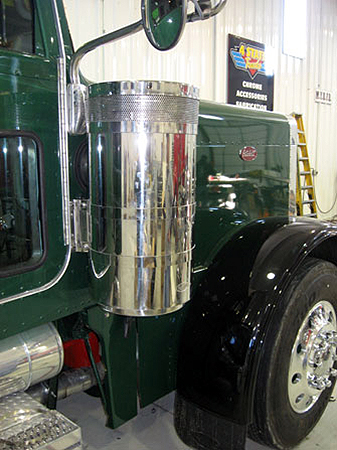
    STEP 12: Step back and check out your work! It looks a lot cooler now, don’t ya think!!

    HowToStep12

    Share. Facebook Twitter Pinterest LinkedIn Tumblr Email
    Previous ArticlePlan Ahead
    Next Article In Memory Of Jerry Jeffries
    Bryan Martin

    Related Posts

    SCI Smart Pad Installation

    March 1, 2025

    Do-It-Yourself – Storage

    April 1, 2024

    How to Install a Shock Box Cover

    March 1, 2023

    2 Comments

    1. Steve on February 24, 2017 10:12 am

      Are any performance issues created by having less air flow?

      Reply
    2. Gustavo Martinez on December 5, 2018 9:12 pm

      Any tips on how to chop the single bolt style peterbilt air cleaner?

      Reply
    Leave A Reply Cancel Reply

    12 ga Customs
    Pacific Coast Insurance picture
    Grand General

    Empire

    10-4 Magazine Swag from Stay Loaded
    Get your 10-4 Gear!
    Archived Editions by Category
    Older 10-4 Archives
    Articles Prior to 2011
    Archives by Edition
    Copyright © 2025. All Images and content on this site are protected by copyright laws, but 10-4 Magazine gives viewers the right to download images or text for personal use. Simply click on most images to access a higher resolution image for viewing and/or downloanding. For commercial uses, call for permission.

    Type above and press Enter to search. Press Esc to cancel.